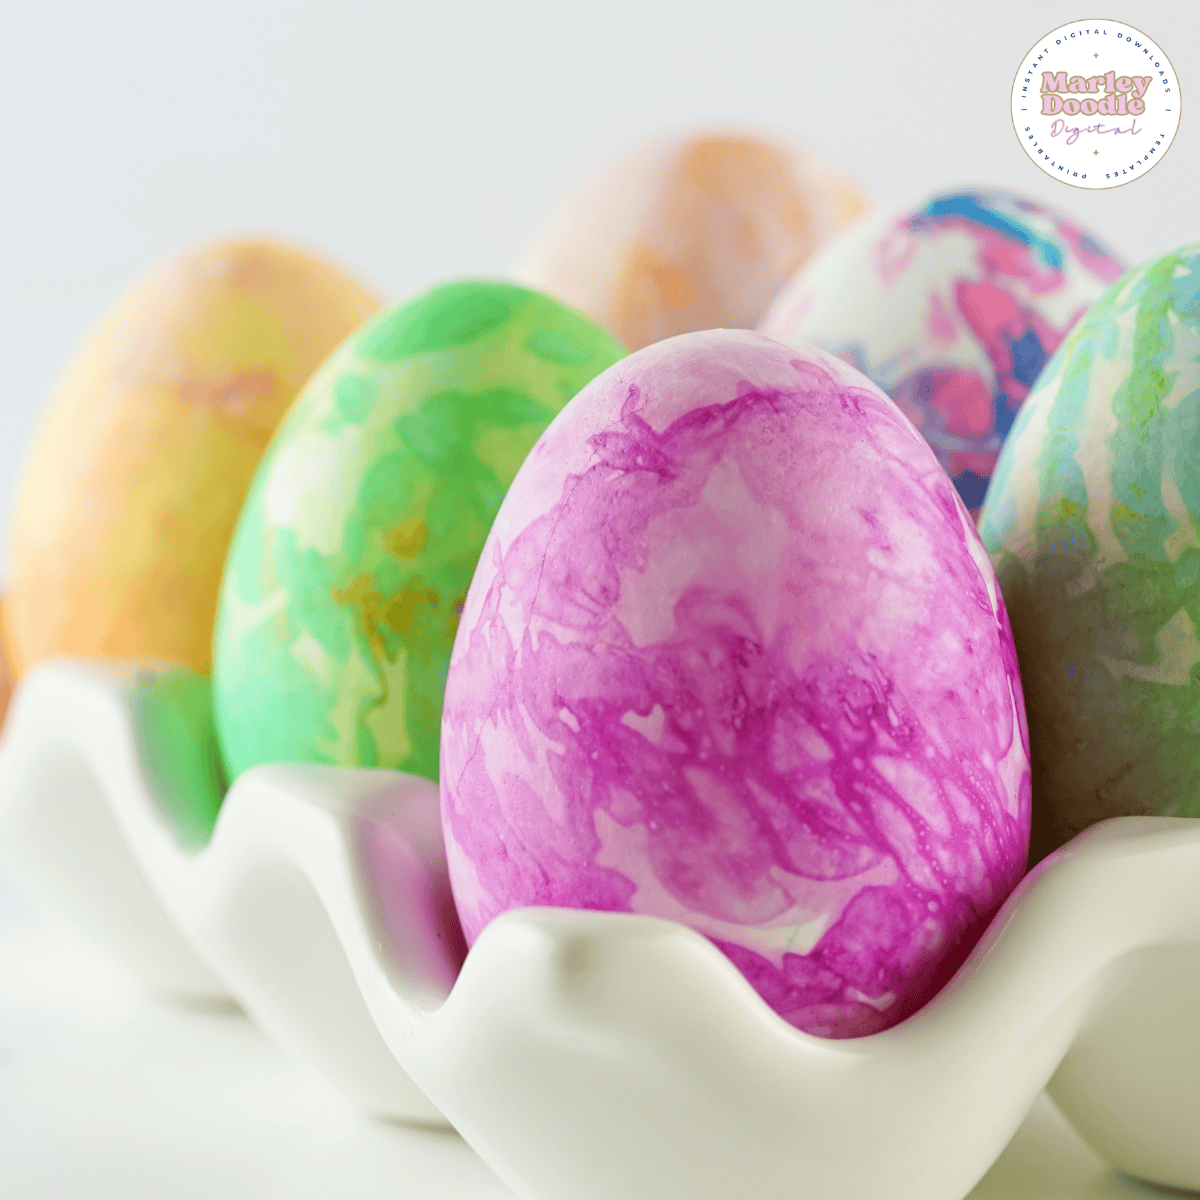
Tissue Paper Dyed Easter Eggs (No Food Coloring Needed!)


Looking for a fun and mess-free way to dye Easter eggs? These tissue paper-dyed eggs create stunning, watercolor-like designs with minimal effort—perfect for kids and adults alike!
There are affiliate links in this post – please read my full disclosure policy. As an Amazon Associate, I earn from qualifying purchases.
Easter egg decorating just got even easier (and way more colorful)! With just a few pieces of bleeding tissue paper and a little vinegar, you can create vibrant, one-of-a-kind designs without the usual mess of traditional dye. This method is great for kids because they can mix and match colors, experiment with different wrapping techniques, and watch the magic happen as the color transfers. Plus, the results are gorgeous—think soft pastels, bold blends, and totally unique patterns. Ready to try this simple, no-fuss way to dye eggs?
You can also make marbled easter eggs using vinegar and oil for a fun variation! OR if you love cosmic stuff, see our fun DIY galaxy easter eggs.
Another cute craft for the spring are these milk jug Easter bunny baskets and pipe cleaner flowers that are perfect for kids to make.

🌟Don’t Leave Before You Check Out These Seasonal Ideas!🌟


Find the full recipe and instructions at the bottom of this post 😊.

📌What You’ll Need
Hard Boiled Eggs – they should be DRY and at ROOM TEMPERATURE.
Rubber Bands
White Vinegar – do not substitute apple cider vinegar.
Paper Towels
*Optional – gloves will help reduce the mess!
🚨Before Starting!
- Room Temperature Eggs: Eggs should be cooled to room temp and dry before starting!

✨How to Make DIY Galaxy Easter Eggs
Pour white vinegar into a small spray bottle. Wrap each boiled egg (pointed end down) in a coffee filter, securing it at the top with a small rubber band.

Wearing rubber gloves if desired, add three drops of each food dye color (blue, purple, and pink) onto the coffee filter-covered egg. Let the colors spread naturally for a beautiful marbled effect.

Lightly spritz the wrapped eggs with vinegar and allow them to sit for about 5 minutes.

Remove the coffee filters and use them to dab any remaining white spots on the eggs. Let the eggs dry for another 5 minutes.

Pour white craft paint into a small dish. Dip the bristles of an old toothbrush into the paint, then use your thumb or finger to flick the bristles, splattering tiny “stars” across the eggs. Rotate each egg to ensure full coverage.
💡Helpful Tips
- Bleeding Tissue Paper Is a Must: Regular tissue paper won’t transfer color, so make sure the package specifically says “bleeding tissue paper.” Dollar store versions often don’t work.
- No Wrong Way to Wrap: You don’t need a perfect technique—just make sure the tissue paper is snug against the egg to transfer the color.
- Don’t Over-Soak: Leaving the eggs in vinegar too long can strip away color, but this takes time, so no stress if you leave them in for an extra minute.
- Works on Brown Eggs Too: The colors will be a little darker on brown or farm-fresh eggs, but the effect is still beautiful.
- Let It Sit for a Richer Color: The longer you let the eggs rest after unwrapping them, the more intense the colors will be.
Who knew tissue paper could make such gorgeous Easter eggs? This simple dyeing method is not only easy and mess-free, but it also creates stunning, one-of-a-kind designs that look like little works of art.

👍You May Also Like These Printables + Ideas
Tissue Paper Easter Eggs

Dyeing Easter eggs with tissue paper is a quick, easy, and mess-free way to create stunning, multi-colored designs. With just a little vinegar and some bleeding tissue paper, you can make beautifully unique eggs in no time—perfect for a fun and creative Easter activity!
Materials
- Boiled Eggs
- 7x7-Inch Pieces of Bleeding Tissue Paper
- Vinegar
- Rubber Bands
- Paper Towels
- Rubber Gloves (optional)
Instructions
- Wrap each boiled egg in two pieces of bleeding tissue paper, either in the same color or two different colors. Secure with rubber bands.
- Fill a jar or cup with vinegar and submerge one egg at a time for 30 seconds, making sure the tissue paper absorbs the liquid.
- Remove the egg and place it in an egg carton to rest for 5 minutes.
- Wear gloves if desired, then carefully unwrap the egg and pat dry with a paper towel.
- Let the egg sit for another 5 minutes in a clean part of the carton to ensure it fully dries.
- Repeat for the remaining eggs, mixing colors for a variety of fun designs!