DIY Shaving Cream Easter Eggs


Easter egg decorating just got a creative twist! With shaving cream and food coloring, you can easily create stunning, marbled eggs that are fun to make and completely unique.
Love Marley Doodle Digital?
Make us your preferred source on Google so our posts, printables, and guides show up first when you search. One tap and you’re set — it’s free and it helps us so much.
There are affiliate links in this post – please read my full disclosure policy. As an Amazon Associate, I earn from qualifying purchases.
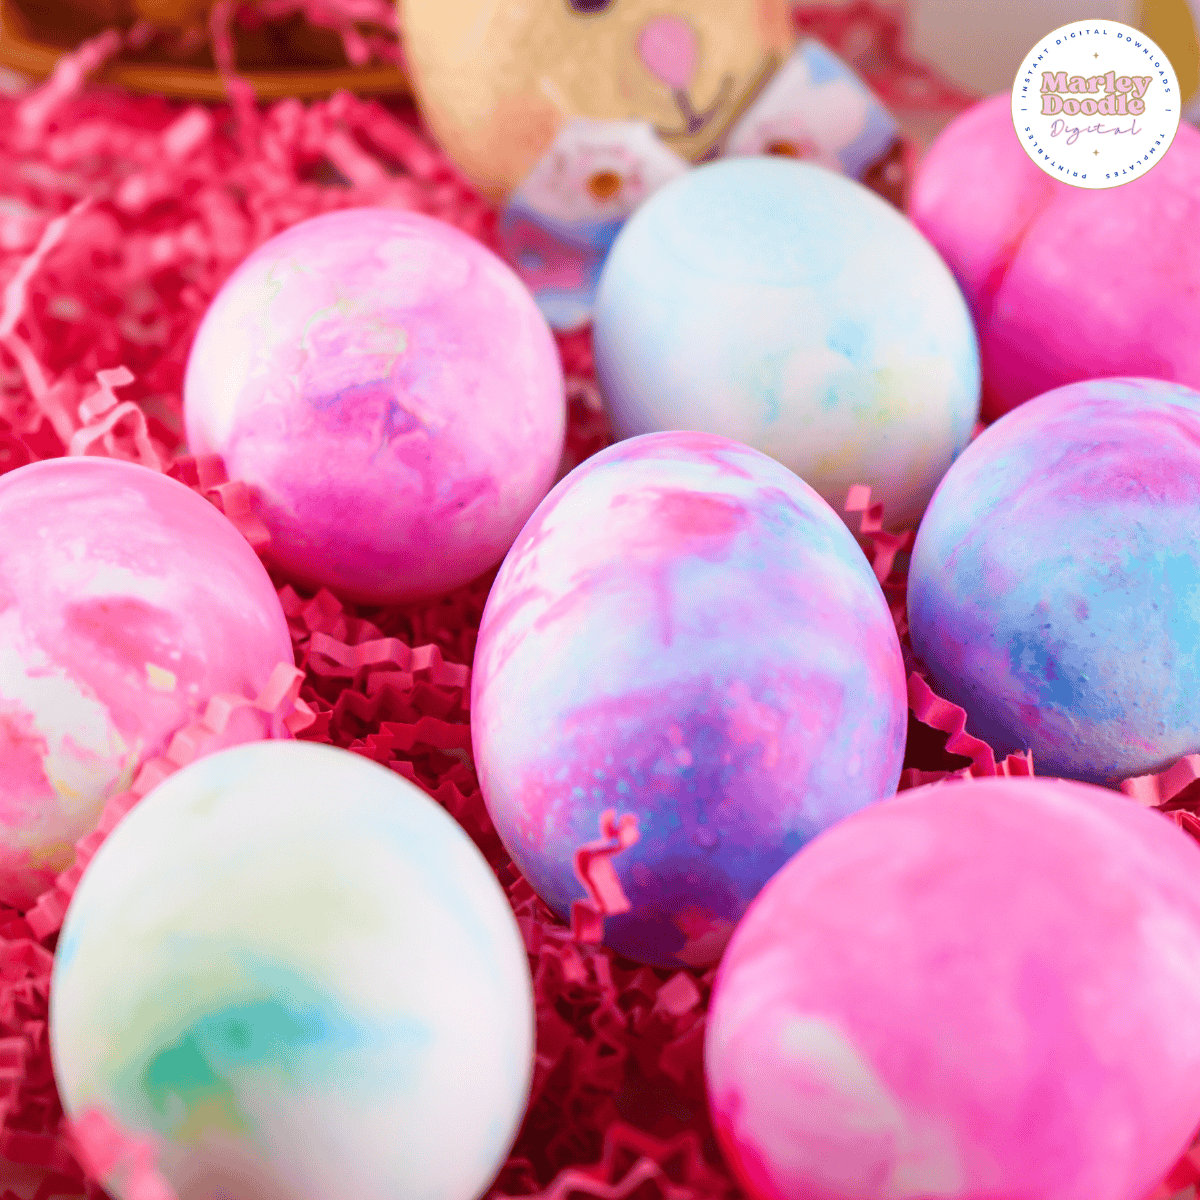
Making Easter eggs has never been more fun (or colorful)! This shaving cream dyeing method is an easy and creative way to turn plain boiled eggs into swirled masterpieces—no cups of liquid dye required. It’s a hands-on activity that kids love, and the best part? You can mix and swirl colors to create completely unique designs every time.
You can also make marbled easter eggs using vinegar and oil for a fun variation! OR if you love cosmic stuff, see our fun DIY galaxy easter eggs. We also have tissue paper dyed eggs that are super cute!
Another cute craft for the spring are these milk jug Easter bunny baskets and pipe cleaner flowers that are perfect for kids to make.

🌟Don’t Leave Before You Check Out These Seasonal Ideas!🌟


Find the full recipe and instructions at the bottom of this post 😊.

📌What You’ll Need
Hard Boiled Eggs – they should be DRY and at ROOM TEMPERATURE.
Rubber Bands
White Vinegar – do not substitute apple cider vinegar.
Paper Towels
*Optional – gloves will help reduce the mess!
🚨Before Starting!
- Room Temperature Eggs: Eggs should be cooled to room temp and dry before starting!

✨How to Dye Easter Eggs Using Shaving Cream
Soak the Eggs: Place boiled eggs in a bowl of vinegar and let them sit for about 10 minutes. This helps the dye stick better. Remove and pat dry, then allow them to fully air dry for about 20 minutes before dyeing.

Prep the Shaving Cream: Fill each section of a muffin tin with shaving cream. You can also use small bowls or trays if you prefer.

Add the Dye: If using gel dye, add one drop per section. If using liquid dye, use two drops. Mix and match colors for fun swirls and patterns.

Swirl the Colors: Use a toothpick to gently swirl the dye into the shaving cream, creating a marbled effect.

Coat the Eggs: Wearing rubber gloves, roll each boiled egg through the dyed shaving cream until fully covered.

Let Them Rest: Place the eggs on a paper towel and let them sit for at least 10–15 minutes so the colors can set.

Rinse and Dry: Gently rinse the eggs under running water—do not rub them! Pat dry with a paper towel and let them air dry for about 20 minutes before handling.

💡Helpful Tips
- Not for Eating: Since shaving cream is used, these eggs are best for decoration only—not for snacking.
- Gel vs. Liquid Dye: Gel dye creates deeper, more intense colors, so use sparingly. Liquid dye is easier to blend and creates a softer look.
- Gloves are Your Friend: Wearing rubber gloves prevents staining and keeps shaving cream off little hands (and out of eyes!).
- Don’t Overdo the Vinegar: Leaving eggs in vinegar longer than 20 minutes can weaken the shells, so keep an eye on the time.
- Watch the Soak Time: Don’t let eggs sit in the shaving cream too long, or it can start to break down the shell.
- Alternative Containers: A muffin tin keeps colors separate and organized, but small bowls or trays work just as well!
Shaving cream-dyed eggs are a fun and easy way to add a colorful twist to your Easter decorating! This simple technique creates gorgeous, marbled designs with minimal effort—perfect for kids and adults alike. Whether you’re swirling bright colors or experimenting with different patterns, each egg turns out totally unique.

👍You May Also Like These Printables + Ideas
How to Dye Easter Eggs Using Shaving Cream

Dyeing Easter eggs with shaving cream is an easy and creative way to achieve beautiful, swirled designs without the mess of traditional dyes. With just a few simple ingredients, you can turn plain eggs into colorful, marbled works of art—perfect for a fun Easter tradition!
Materials
- Boiled Eggs (as many as you like)
- 1 Container Shaving Cream
- Vinegar
- Liquid Water Based Food Dye
Instructions
- Soak boiled eggs in a bowl of vinegar for 10 minutes, then remove, pat dry, and let them air dry for 20 minutes.
- Fill each section of a muffin tin (or small bowl) with shaving cream.
- Add one drop of gel dye or two drops of liquid dye per section. Swirl with a toothpick to create marbled patterns.
- Roll each egg in the dyed shaving cream, making sure they’re fully coated.
- Let the eggs sit for 10–15 minutes before rinsing them under cool water. Do not rub—just rinse gently!
- Pat dry with a paper towel and allow them to air dry for about 20 minutes before handling.